GET WATER DAMAGE HELP NOW

Speak with our Restoration Expert

Preventing Mold Growth After Water Damage
Uncategorized

Preventing Mold Growth After Water Damage

Water damage is a common issue, especially in older homes in damp areas like the Pacific Northwest. After a leak or flood, cleaning up water or excess moisture can be tough, and fixing the damage it causes can be frustrating. An undesirable consequence of water in homes is its potential to promote mold growth. Preventing mold growth in your home is like tending to a garden before weeds have a chance to take root. Just as diligent gardeners weed their plots regularly to stop unwanted growth, proactive homeowners take steps to prevent moisture buildup and address potential sources of mold before it becomes a problem.  It’s far easier to maintain a healthy indoor environment by controlling humidity levels, fixing leaks promptly, and ensuring proper ventilation than it is to deal with the extensive remediation required once mold has taken hold. Just as pulling weeds early can save time and effort in the long run, preventing mold growth before it occurs can spare homeowners from the inconvenience, expense, and health risks associated with mold remediation.  Here we provide you with preventive measures you could take to stop mold from growing in your home. What Exactly is Mold and How Does it Develop? Mold is a common concern due to its potential damage to surfaces and its impact on health. According to reports, approximately 70% of homes in the United States harbor some level of mold. But what exactly is mold, and how does it grow? Knowing this helps prevent its spread in your home, especially after water damage occurs. Mold begins as tiny spores, some of which are so minuscule they can travel through the air until they find a suitable environment. Moisture is a key factor in mold growth, making areas like bathrooms, windowsills, or areas with leaking roofs susceptible. Even minor condensation can foster mold growth, meaning significant water damage increases the likelihood of a mold problem. Addressing water damage or excess humidity promptly is essential. Mold allergies can trigger unpleasant symptoms in both adults and children, including sneezing, coughing, itching, runny nose, dry skin, sore throat, eye irritation, and headaches. By tackling moisture issues swiftly, you can mitigate the risk of mold growth and its associated health impacts. 6 Steps to Prevent Mold After Water Damage 1. Remove Excess Water After a flood or leak, your first task is to eliminate excess moisture to assess the damage and initiate drying procedures. Swift action minimizes the risk of mold proliferation. While using plastic buckets can be effective and budget-friendly, it’s labor-intensive. Alternatively, employing a wet-dry vacuum, available for purchase or rental at hardware stores, offers a more thorough and less strenuous approach. 2. Remove Damaged Flooring Damaged flooring, especially grooved surfaces like stone-tiled floors, must be removed promptly to prevent mold growth. Carpets are particularly prone to mold due to their warmth and moisture-retaining properties. In cases of minimal damage, drying solutions like baking soda or targeted cleaners may suffice. However, extensive damage often necessitates complete flooring removal. 3. Towel Dry Floors and Furniture Prioritize drying affected areas with towels and rags before taking further action. Absorbing excess moisture from floors and furniture allows for a more accurate assessment of damage and appropriate measures. Regularly wiping down moisture-prone surfaces, such as bathroom floors and window sills, aids in preventing mold growth. 4. Utilize Dehumidifiers Maintaining low relative humidity is needed for mold prevention, as mold thrives in warm, moist environments. The Environmental Protection Agency recommends keeping indoor humidity below 60%. Dehumidifiers extract moisture from the air, creating an inhospitable environment for mold. Employing strong fans can also aid in moisture reduction. 5. Disinfect Surfaces Following drying procedures, disinfect impacted surfaces to eradicate bacteria and prevent further deterioration. Consumer-grade disinfectants effectively eliminate bacteria, preventing mold proliferation. 6. Replace Damaged Items In cases where repair is not feasible, replacing water-damaged items is advisable, especially if structural integrity is compromised. Signs such as discoloration, musty odors, or texture alteration warrant replacement to mitigate mold risks. Though daunting, replacing severely damaged items preemptively saves both time and money in the long run, preventing mold-related complications. When Do You Need a Professional for Mold Cleanup? Deciding if you need a pro to clean up mold depends on a few things. If the moldy area is smaller than 10 square feet (like a patch less than 3 feet by 3 feet), you can handle it yourself by following cleanup tips. But if there’s been a lot of water damage or the mold covers more than 10 square feet, check out the EPA’s guide for big jobs. If you’re not sure how big the job is, it’s a good idea to talk to a mold cleanup company with experience. By taking proactive steps to dry out wet areas, remove damaged materials, and reduce moisture levels, you can prevent mold from spreading and causing further harm. Seeking assistance from professionals like H2O Restoration is important because they have the expertise and equipment to assess the extent of water damage, identify hidden moisture pockets, and implement effective mold prevention strategies. Their assistance ensures thorough and proper mitigation of water damage, minimizing the risk of mold growth and its associated consequences. Final Thoughts  Preventing mold growth after water damage underscores the importance of swift and proactive measures in mitigating the risks associated with mold proliferation following water damage incidents. The significance of controlling moisture levels, addressing leaks promptly, and ensuring proper ventilation is to maintain a healthy indoor environment.  Practical steps such as removing excess water, replacing damaged flooring, towel-drying surfaces, utilizing dehumidifiers, disinfecting impacted areas, and replacing irreparably damaged items can minimize the likelihood of mold growth, thereby avoiding the associated inconveniences, expenses, and health risks. FAQs How do you prevent mold growth after water damage? To prevent mold growth after water damage, it’s crucial to act quickly and effectively. Start by removing excess water using methods like mopping, blotting, or utilizing wet-dry vacuums. Ensure proper ventilation by opening windows and using fans. Thoroughly dry affected areas

Insurance Coverage for Natural Disasters
Uncategorized

Insurance Coverage for Natural Disasters

The United States experienced a staggering 97 natural disasters in 2021 alone. Among these, 64 were attributed to severe thunderstorms, while 14 were the result of wildfire outbreaks, heat waves, and drought. Additionally, 12 disasters stemmed from floods and flash floods. This data underscores the increasing frequency and diversity of natural disasters plaguing the nation, emphasizing the urgent need for comprehensive insurance coverage in vulnerable regions. However, following extreme weather events, many major insurers are now refraining from providing the coverage that homeowners in disaster-prone areas rely on the most. At least five prominent U.S. property insurers, such as Allstate, American Family, Nationwide, Erie Insurance Group, and Berkshire Hathaway, have informed regulators that they are ceasing to offer certain coverages in specific regions due to the effects of climate change-induced extreme weather patterns. This includes excluding protections for various weather events and implementing increases in monthly premiums and deductibles. Which Disasters Does Homeowners Insurance Cover? Typically, a standard homeowners insurance policy covers a wide array of disasters, with exceptions specified in the policy. The most comprehensive policies will typically protect against damage caused by: 1. House fires, including kitchen fires 2. Wildfires 3. Ice, snow, and deep freezes 4. Lightning strikes 5. Volcanic eruptions 6. Wind and hailstorms 7. Hurricane wind damage, although this might vary in certain coastal areas 8. Falling objects, such as tree branches Reviewing the specifics of your homeowner’s insurance coverage is advisable to ensure you’re adequately protected and to avoid any surprises regarding what incidents are eligible for a claim. What Disasters Aren’t Covered by Homeowners Insurance? Standard homeowners insurance policies typically do not cover damage resulting from floods and earthquakes. For protection against these events, separate insurance policies specifically tailored for flood and earthquake coverage are necessary in addition to your home insurance policy. Earthquake Damage Earthquake insurance can be purchased from private insurance companies in most states, while California residents have the option to buy earthquake insurance from companies affiliated with the California Earthquake Authority. The annual cost of earthquake insurance averages around $850, but this can vary depending on factors such as your home’s characteristics, location, and chosen deductible. Although home insurance generally excludes coverage for earthquake damage, there is one exception: if an earthquake triggers a fire that causes damage to your home, the fire damage may be covered under your home insurance policy. In such cases, additional living expenses coverage could also help cover temporary relocation costs during repairs. Flood Damage Coverage for flood damage is available through the National Flood Insurance Program (NFIP) and private insurance companies. NFIP policies typically offer up to $250,000 for dwelling coverage and $100,000 for personal contents protection. If higher coverage limits are needed, private flood insurance policies can be purchased. The cost of flood insurance varies based on factors such as flood risk, property characteristics, coverage amount, policy type, and insurer. On average, NFIP flood insurance costs around $859 per year, according to an analysis by Forbes Advisor. Hurricane Wind Damage Certain coastal areas, such as coastal Texas, may exclude coverage for wind damage in standard home insurance policies. In such regions, obtaining coverage for windstorms and hail damage may require purchasing a policy endorsement or a separate insurance policy specifically designed to cover these perils. Alternatively, homeowners in areas where wind damage coverage is limited may have options such as a state’s FAIR (Fair Access to Insurance Requirements Plan) or a Beach plan. FAIR plans provide coverage as a last resort for homeowners facing high risks, while Beach plans are available exclusively in specific coastal communities along the Atlantic and Gulf coasts. Knowing What Insurance Deductibles Is An insurance deductible represents the portion subtracted from a claim payment when certain types of insurance claims are filed, such as those for damages to your home. In homeowners insurance, deductibles are typically specified as a dollar amount, such as $500 or $1,000. For instance, if your policy carries a $1,000 deductible and your home sustains $10,000 in damages, your insurance company would reimburse you $9,000. Alternatively, deductibles can be defined as a percentage of your home’s insured value. This is often the case with a hurricane deductible, which commonly ranges between 1% and 5%, but can climb as high as 10% in high-risk areas like the Florida coast. For example, if your home is insured for $300,000 and you have a 2% hurricane deductible, your out-of-pocket expense would be $6,000 in the event of a hurricane-related claim. Notably, only 19 states along with Washington, D.C., permit insurance companies to apply a hurricane deductible. These states include Alabama, Connecticut, Delaware, Florida, Georgia, Hawaii, Louisiana, Maine, Maryland, Massachusetts, Mississippi, New Jersey, New York, North Carolina, Pennsylvania, Rhode Island, South Carolina, Texas, and Virginia. Similarly, earthquake insurance may feature a percentage-based deductible. This deductible typically ranges from 2% to 20% of your dwelling coverage amount. In states prone to earthquakes, insurance companies may establish a minimum deductible, such as 10%, as outlined by the Insurance Information Institute. Steps to Take When Facing Damage From a Natural Disaster 1. Reach Out to Your Homeowners Insurance Provider Promptly contact your insurance agent or company following any damage. If your home becomes uninhabitable, discuss the additional living expenses coverage included in your policy. This coverage, also known as loss of use, assists with expenses like hotel accommodations, meals, and storage. Ensure you retain all receipts for these expenses to facilitate a claim for additional living expenses. 2. Evaluate and Document the Damage Document the damage to your property and personal belongings by taking photographs. Note the type of damage, estimated value, and approximate purchase dates as you capture images. This documentation will be invaluable when filing an insurance claim. Maintaining a home inventory can further streamline the claims process. 3. Inquire with Your Home Insurance Company Seek clarification from your insurance provider by asking pertinent questions:    – Can I initiate cleanup efforts?    – Is it advisable to commence repairs?    – Should I obtain repair estimates?    – When is the

Restoring Water-Damaged Furniture and Upholstery
Uncategorized

Restoring Water-Damaged Furniture and Upholstery

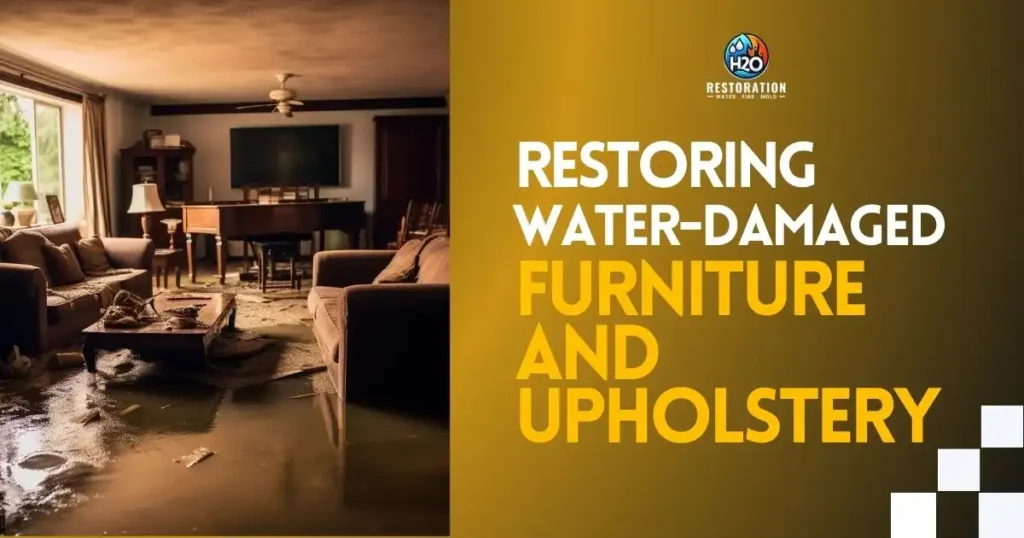
Water damage impacts approximately 14,000 individuals in the United States each day. To put it differently, roughly 1 out of every 60 insured homes file a claim for water or freezing damage annually. Severe water damage in homes often results from heavy rains, floods, or excessive water overflow, leading to significant harm to household belongings, particularly carpets and furniture. While it may appear that damaged furniture cannot be fully restored, water damage is not always irreparable.  In many cases, water-damaged furniture can be effectively managed, though it may not regain its original condition entirely. Whether wood or upholstered, furniture in your home can undergo restoration with careful attention and proper techniques. Has your furniture recently suffered water damage? Don’t worry! We provide you with fundamental tips to restore your furniture to its former glory! How Does Water Damage Impact Your Furniture? Water damage can manifest in various ways, each presenting unique challenges for restoration. Wood furniture is particularly vulnerable, as excess moisture can cause it to swell and contract, compromising its structural integrity. Upholstered furniture is also susceptible, with water seepage leading to stains, odors, and mold growth. Neglecting water damage can exacerbate the situation, resulting in permanent harm to your furniture. Here are the key indicators to watch for: 1. Swelling: Wood furniture may swell, altering its shape due to water absorption. 2. Warping: Water damage can cause warping, resulting in uneven or curved surfaces. 3. Discoloration: Water stains or discoloration on furniture surfaces can indicate moisture penetration. 4. Mold Growth: The presence of mold or mildew on upholstery or wood surfaces suggests prolonged exposure to moisture. 5. Musty Odor: Lingering musty smells emanating from furniture may signal mold or mildew growth due to water damage. 6. Softening: Softened wood or fabric fibers indicate saturation with water, compromising their strength and stability. 7. Rust or Corrosion: Metal components of furniture may exhibit signs of rust or corrosion from prolonged water exposure. 8. Stubborn Stains: Water stains on upholstery or fabric that resist removal can be a telltale sign of water damage. Wooden Furniture Repair Tips 1. Dry Out the Wood After water damage, it’s important to promptly dry out wooden furniture to prevent further damage. Exposure to prolonged moisture can severely harm the wood. Place the furniture in direct sunlight or use fans and dryers to expedite the drying process. However, be mindful of weather conditions; extreme cold slows drying and can promote mold growth, while excessive heat may cause cracks in the wood. 2. Treat White Spots Contaminated water often leaves behind white spots on wood furniture. Fortunately, these spots can be easily treated. Create a cleaning solution by mixing equal parts baking soda and toothpaste. Dampen a cloth with this solution and gently scrub the affected areas. Once the spots are removed, polish the wood with a dry cloth to restore its shine. 3. Clean Moldy Black Spots In addition to white spots, water damage may also lead to black mold spots on wooden furniture. These spots indicate that water has penetrated deep into the wood, damaging its finish. To remove mold, carefully strip away the damaged finish, clean the affected areas with a peroxide solution, and apply a new finish. 4. Repair Crumpled Veneer Water exposure can cause the veneer on wooden furniture to crumple. To repair it, soak the veneer with a moisturizer until it flattens. Once flat, clean and dry the surface. Then, using a syringe, inject veneer glue between the furniture and its coating. Apply pressure with a heavy block to ensure proper adhesion. Allow the glue to dry completely before removing the block. Tips for Restoring Upholstered Furniture Restoring water-damaged upholstered furniture can be challenging, but with the right approach, you can revive your cherished pieces. From drying out the fabric to addressing stubborn stains and odors, the restoration process demands careful attention. Below, we outline the tips to restore water-damaged upholstery, providing clear instructions to guide you through the process effectively. 1. Remove and Dry Upholstery Fabric Start by carefully removing the upholstery fabric from the furniture frame and allowing it to air dry completely. Avoid using heat sources like hair dryers, as they can damage the fabric. 2. Vacuum Use a vacuum with a brush attachment to gently remove any debris or dirt from the upholstery fabric. 3. Spot Cleaning Treat visible stains or spots on the upholstery fabric with a mild detergent solution and a clean cloth. Blot the area gently to prevent spreading the stain. 4. Steam Cleaning For deeper cleaning, consider using a steam cleaner to remove embedded dirt and bacteria from the upholstery fabric. Follow the manufacturer’s instructions carefully to avoid damaging the fabric. 5. Drying Ensure the upholstery fabric is completely dry before reassembling the furniture. Proper ventilation is essential to prevent mold and mildew growth. 6. Repair or Reupholster If the upholstery fabric is extensively damaged, you may need to sew patches or consider reupholstering the furniture for a complete restoration. 7. Apply Fabric Protector To safeguard your newly restored upholstery from future water damage, consider applying a fabric protector spray following the manufacturer’s instructions. Preserving Water-Damaged Furniture with Professional Help Understanding how to restore water-damaged furniture and upholstery is necessary for preserving and prolonging the lifespan of valuable belongings. Prompt restoration can prevent further damage, such as mold growth or structural deterioration, saving both time and money in the long run.  Seeking assistance from professionals in restoring water-damaged furniture and upholstery is essential due to their expertise and specialized equipment, ensuring thorough and effective restoration.  Professionals like H2O Restoration can accurately assess the extent of the damage and employ appropriate techniques to mitigate water-damaged furniture and upholstery, minimizing the risk of irreversible harm to the furniture and promoting a safe and healthy living environment. The significance lies in safeguarding investments, maintaining the integrity of belongings, and ensuring the well-being of occupants in the affected space. Final Thoughts  While water damage to furniture and upholstery can present significant challenges, proactive restoration efforts guided

A Comprehensive Checklist for Post-Flood Cleanup and Restoration
Uncategorized

A Comprehensive Checklist for Post-Flood Cleanup and Restoration

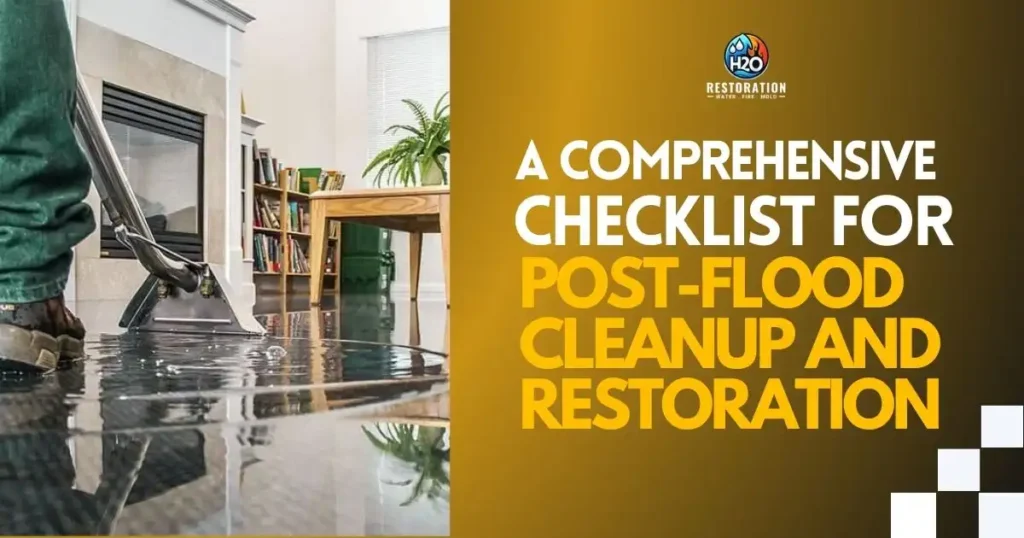
Between 1996 and 2019, floods hit 99% of U.S. counties. As the climate changes around the world, the storms are getting worse — and most of this nation of 109 million live in their path. Experiencing damage to personal property by flooding can be devastating, but knowing there are steps to take during post-flood cleanup and restoration can help give you some peace of mind. After a flood, combating mold growth becomes a prominent issue, as it not only threatens the health of occupants but also amplifies the structural deterioration of your residence. So how will you restore and clean your home after the Flood?  The Comprehensive Checklist for Flood Recovery will surely help you. What causes Flood? Flood damage knows no bounds, emerging from a myriad of sources such as seasonal downpours, sewer line backups, or the catastrophic force of a hurricane—such as the unforgettable impact of Hurricane Ian on the Fort Myers, FL area in October 2022. Regardless of its origin, the aftermath of such devastation presents formidable challenges. Floods can arise from a myriad of factors, often occurring concurrently. Among these factors, excessive and intense rains are out as a primary cause, particularly in the context of flash floods. When rainfall inundates all stan, low-lying regions, and urban landscapes at a pace faster than the ground can absorb, water levels escalate swiftly, leading to flooding.  Moreover, extreme precipitation in river basins exacerbates the situation, as torrents of water cascade downstream, breaching riverbanks and inundating adjacent areas.      9 Steps You Need To Take First After The Disaster 1. Take care of yourself first If you are ill or injured, get prompt medical attention. Protect yourself from stress, fatigue, and flood-specific hazards. If you need food, clothing, shelter, or referral to health care and human services call 911. 2. Home first aid If evacuated, return home only when authorities indicate it is safe to do so. Dangers do not end when floodwaters recede, and some – such as chemical and sewage contamination, electrical shock, and inhalation hazards, may be invisible.  If you’re unsure about whether your home is safe after a disaster, it’s necessary to get it checked by a professional like a building inspector or structural engineer before going back in. Once they confirm it’s safe, be cautious as you enter. It’s best to keep small children and pets away from the damaged area, as it might still pose risks. 3. Organize all important things Record all losses and expenses by taking photos, saving receipts, and informing your insurance agent. Not everything needs fixing, and some tasks might be too complex or costly to handle alone. A recovery plan can guide you in prioritizing and efficiently using your resources. 4. Home Drying Basics Floodwaters damage materials, leaving mud, silt, and contaminants that can promote the growth of mold. You need to safely and thoroughly dry your home to reduce these hazards and the damage they cause. 5. Restoring utilities Your work will be much easier if you have heat, electricity, clean water, and sewage disposal. If storm-damaged, we suggest these services be formally inspected and safely restored only by certified utility workers, as quickly as possible. 6. Clean the mess Save Important Documents and Keepsakes, Official documents and cherished family items can often be saved if treated carefully. Discard contaminated food, any food that has come into contact with floodwater, even if packaged, should be thrown away. Clean and disinfect any part of your home or household items that have been flooded. When unsure, it’s better to discard items to avoid the risk of injury or infection. 7. Exploring Financial Aid Options National, state, and regional volunteer agencies, along with businesses, insurance services, and various levels of government (City, County, State, and Federal) offer disaster programs, loans, and benefit guidance to provide significant support throughout the recovery and claims process. 8. Rebuild and floodproof Take your time fixing and reconstructing your home while prioritizing safety. Make upgrades that will shield your building from future floods and other probable disasters. Watch out for scams and frauds, and avoid hastily agreeing to settlements or contracts.  Always ask for written estimates and opinions from trustworthy companies that can prove their credentials, training, and insurance. Don’t be afraid to request multiple references and check their previous work. 9. Prepare yourself for the next flood Secure yourself and get ready for the next flood by obtaining flood insurance, creating a detailed list of your belongings at home, and developing a family plan for how to respond in case of a flood. Make sure your plan considers the specific flood risks in your community and any available protection programs. Checklist for Cleaning Up After a Flood 1.  Remove Residual Mud and Dirt After pumping out the standing water, gather your gear—boots, gloves, shovel, and trash can. Use the shovel to clear any dirt left behind by the flood, depositing it into the trash can for removal from your home. Ensure not to overload the trash can to avoid strain from heavy lifting. 2. Dispose of Items Damaged Beyond Repair Sadly, not all possessions survive a flood unscathed. Upholstered furniture, mattresses, box springs, and pillows usually succumb to mold or mildew and should be discarded. Assess wood furniture for structural integrity; if compromised, discard it as well. 3. Set Up A Dry-Out Zone for Salvageable Items Designate an area, indoors or outdoors, where salvageable items can dry. Clean each piece with an approved furniture cleaner and cloth before placing them in the dry-out zone. Launder contaminated curtains and consider professional cleaning for rugs; damaged items may require disposal. 4. Tear Out Damaged Flooring Flood-damaged carpet, padding, and warped wood or laminate flooring must be removed promptly to prevent subfloor damage. Use pliers or a pry bar to lift carpet, cutting it into manageable sections. Similarly, saw wood or laminate flooring into small pieces, ensuring to check the subfloor for any issues. 5. Check Walls for Bubbles and Soft Spots Inspect walls for signs of

Restoring Electronics After Water Damage
Uncategorized

Restoring Electronics After Water Damage

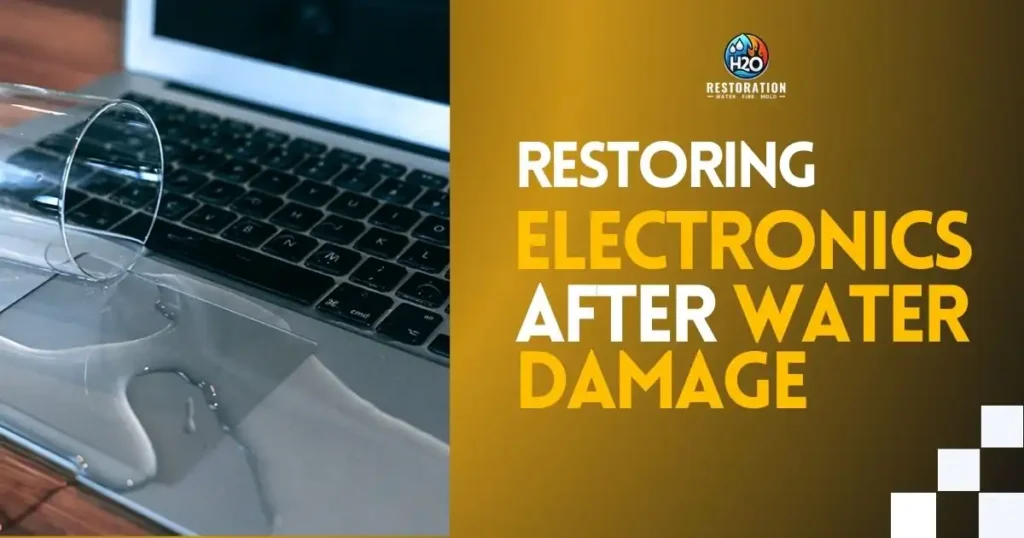
Water damage poses a significant risk to electronic devices such as smartphones, laptops, and tablets. This hazard may arise from various scenarios, including accidental immersion in water bodies or exposure to rainfall. The consequences of water damage can be severe, resulting in operational malfunctions or complete device failure.  According to various studies and industry reports, water damage is a significant issue for electronic devices, with millions of devices affected annually worldwide. For example, one report suggested that water damage accounted for approximately 35% of all smartphone repairs. Another study found that nearly 20% of laptop repairs were attributed to water damage.  When electronic devices come into contact with water, ingress into internal components can lead to corrosion and short circuits, manifesting as issues ranging from impaired screens or keyboards to total device dysfunctionality. It is imperative to promptly address any instances of water exposure to mitigate potential long-term damage. How Water Damages Electronics  Water, as a good conductor of electricity, poses a significant risk to electronic devices such as smartphones, laptops, and tablets. Its ability to easily penetrate the internal components of these devices can lead to short circuits and other electrical malfunctions. Beyond the immediate danger of short-circuiting, water can also initiate corrosive processes within the device, causing long-term damage such as corrosion, oxidation, and rust. These effects may not always be immediately apparent and can manifest over time, even if the device initially appears to be functioning normally post-exposure. How Water Damages Electronics  In addition to water itself, the presence of salt and minerals in certain types of water exacerbates the damage inflicted on electronic devices. Salt and minerals, commonly found in ocean water and salt spray, contain ions that can accelerate the corrosion of metal components within the device. This corrosion process contributes to the formation of rust and oxidation, further compromising the device’s functionality. Moreover, the pH level of water can influence the extent of damage caused by salt and minerals, with acidic or alkaline water potentially exacerbating the corrosive effects. Effects of Different Types of Water Not all water sources pose the same level of risk to electronic devices. While freshwater may cause less immediate damage compared to saltwater or mineral-laden water, it still presents a significant threat if it infiltrates the device’s internal components. Even small amounts of freshwater can initiate corrosion and electrical malfunctions, underscoring the importance of swift action to mitigate potential damage. Water damage represents a formidable challenge for electronic devices, necessitating prompt and effective intervention to prevent irreversible harm. In the event of water exposure, immediate steps such as powering off the device, removing the battery (if possible), and seeking professional assistance are crucial to mitigate further damage and restore functionality. Additionally, implementing preventive measures such as waterproof casings or protective coatings can help safeguard electronic devices from water-related hazards in the future. How to Identify and Address Potential Issues Recognizing the symptoms of water damage is integral for promptly addressing issues and minimizing long-term damage to your device. Identifying Corrosion One of the primary indicators of water damage in electronics is corrosion, which occurs when water reacts with metal components, causing oxidation and deterioration. Signs of corrosion may include discoloration or rust on metal parts, pitting or etching of surfaces, faded or discolored circuit boards, and the presence of green or white buildup on the circuit board. Signs of Short Circuits Water damage can also trigger short circuits, where electrical circuits come into contact, leading to excessive current flow, overheating, sparks, and potential fires. Detecting signs of short circuits is necessary for preventing further damage. Look out for burn marks or discoloration on the device, smoke or burning smells, the device turning on and off spontaneously, as well as sparks or electrical shocks. Malfunction and Failure Water damage can cause electronic devices to malfunction or cease functioning altogether. Malfunction may manifest as the device not powering on, experiencing freezes, crashes, or displaying error messages. Complete failure occurs when the device stops working entirely. If you notice your device exhibiting any of these signs, it’s essential to take immediate action to prevent further damage. Immediate Actions After Water Exposure When your electronic devices come into contact with water, swift action is crucial to prevent further damage. Here’s what you need to do right away: Disconnecting Power The first step is to cut off the power source. Unplug the device from the wall socket and remove any batteries. This helps prevent short circuits that could worsen the damage. Removing the Battery If your device has a removable battery, take it out as soon as possible. This stops electrical currents from flowing through the device and causing more harm. Shaking Out Excess Water After disconnecting the power and removing the battery, gently shake the device or use a towel to soak up any visible water. Avoid using a hair dryer or heat source, as this can cause further damage. By following these steps, you can minimize the damage from water exposure. However, keep in mind that these actions might not always save your device. If it doesn’t work after these steps, seek professional help or consider replacing it. Cleaning and Drying Process Water damage can wreak havoc on electronic devices, but there are ways to mitigate the damage through proper cleaning and drying techniques: Use of Desiccants Desiccants like silica gel packets absorb moisture from the air. Place your device in a sealed container with silica gel packets or uncooked rice to help draw out moisture. Be cautious with rice as it can leave behind dust and debris. Isopropyl Alcohol Cleaning Isopropyl alcohol, at a high concentration of 90% or higher, can effectively clean water-damaged electronics. Turn off and unplug your device, then gently wipe the affected areas with isopropyl alcohol using a soft cloth. Avoid using water, as it can worsen the damage. Air Drying Techniques Air drying is another effective method. Turn off and unplug your device, remove excess water with a soft cloth, and place it in a

Effective Methods for Identifying Water Damage in Drywall
Uncategorized

Effective Methods for Identifying Water Damage in Drywall

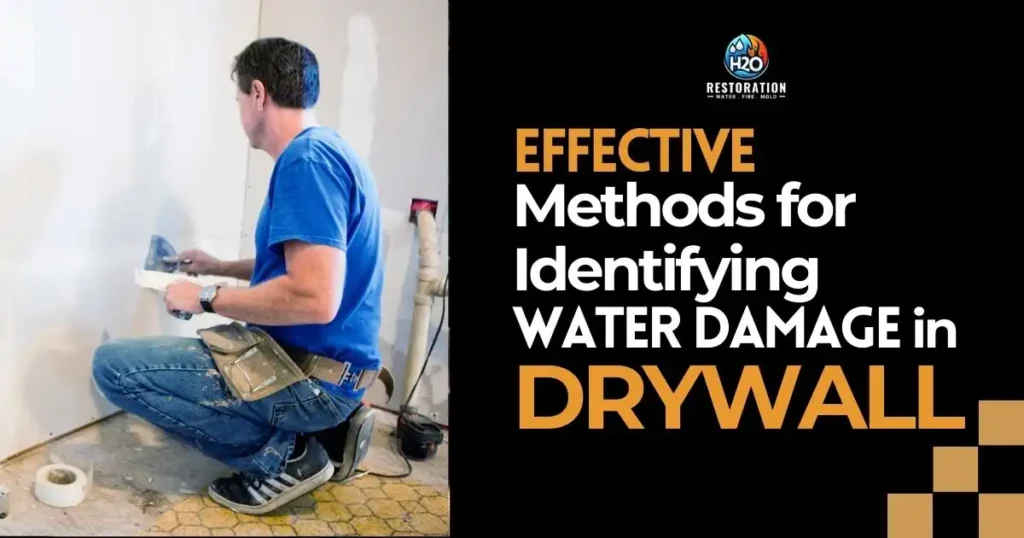
Water damage to drywall is a frequent issue in households. When drywall absorbs water, it creates an environment conducive to mold growth, leading to additional damage. Whether the water damage stems from a roof leak, air conditioner malfunction, flooding, or another source, it’s integral to address repairs promptly.  According to HomeAdvisor, repairing drywall costs approximately $500 on average, with variations depending on the extent of damage. Repairing damage promptly is more economical than replacement. Therefore, addressing water damage immediately can save money by preventing further deterioration that may necessitate costly replacement. Furthermore, damp drywall can compromise your home’s structural integrity. Although drywall itself isn’t load-bearing, its deterioration can adversely affect surrounding structures, leading to significant issues and potentially creating unsafe conditions for occupants it is because drywall becomes an ideal breeding ground for harmful bacteria and mold, posing potential health risks. The Safe Moisture Levels in Drywall In our homes, the moisture level can vary, with humidity typically hovering around 50%. But when When it comes to drywall, it’s essential to maintain the right moisture balance for safety. So, what exactly is the safe level of moisture for drywall? Drywall is considered safe when its moisture content falls between 5% and 12%. Even if the moisture level creeps up to 17%, the drywall can still be salvaged. However, any moisture level beyond 17% indicates significant damage, rendering the drywall unusable and necessitating replacement. A Simple Guide to Identifying Wet Drywall Examine its color Look for discolored patches on the wall where the paint used to be white – this could indicate water stains. Inspect for signs of mold growth Mold thrives in damp spots like bathrooms, kitchens, basements, and crawl spaces, and can even hide under wallpapers. Pay close attention to areas near ceilings and walls, where visible mold might be present. Scrutinize the flooring Cracks or holes may suggest moisture seepage from the subfloor. Look for dry rot where the flooring meets the walls – if you find any, replace the affected wood promptly. Assessing Moisture Levels Using Moisture Meter Following a flood, gauging the moisture content in affected areas provides valuable insight into the extent of water damage. This assessment, particularly concerning drywall, lays the groundwork for restoring your home to its pre-damage condition. Professionals employ various types of moisture meters to measure drywall moisture, including: 1. Pin-type meter: Equipped with probes or pins, this meter measures the moisture content of drywall and other affected materials. 2. Pinless moisture meter: Commonly used for assessing moisture in flooring, this meter operates without probes. 3. Thermo hygrometer: Designed to measure relative humidity, this device provides a comprehensive overview of moisture levels in affected areas. Where Else Could Moisture Linger? Whether facing a burst pipe or a severe weather event, understanding the extent of moisture after the incident is needed for assessing the water damage restoration process. Moisture tends to lurk in various places such as drywall, wood, carpeting, and other surfaces. Here are the key areas where moisture commonly hides following a flood: Carpeting Those who have encountered water damage in carpeted areas understand how saturated both the carpeting and padding can become. Even when efforts are made to dry out the carpeting, residual moisture may persist, fostering mold growth and other issues over time. Wood Floors Ideally, the moisture content of wood in interior spaces should range from 6% to 8%. However, post-flood, moisture levels can skyrocket to over 20%. With the aid of dehumidifiers and drying equipment, wood can gradually return to an acceptable moisture level over time. Furniture Furniture, with its combination of fabric, cushions, and wood components, is a magnet for hidden moisture. The drying process for large pieces of furniture can be prolonged due to the materials involved. Ceilings Often composed of drywall or similarly permeable materials, ceilings are susceptible to water damage, especially in cases of roof leaks. Elevated moisture readings may signal the need for removal and replacement of affected ceiling sections. Early Detection & Professional Aid in Drywall Water Damage It’s important to know effective methods for identifying water damage in drywall because early detection allows for prompt action to prevent further damage and mitigate potential health hazards associated with mold growth.  Seeking assistance from professionals like H2O Restoration for wall drying is essential because they possess the expertise, tools, and resources to thoroughly address water damage, ensuring effective drying and minimizing the risk of structural issues and mold proliferation.  The significance lies in safeguarding the integrity of the property and the health of its occupants by efficiently mitigating water damage and its associated consequences through expert intervention. Final Thoughts Understanding water damage and its implications is key to maintaining a safe and healthy home. Identifying water damage in drywall early on is primal, as it can prevent further deterioration and health hazards associated with mold growth.  Seeking professional assistance for wall drying is essential, as experts have the knowledge and tools to address water damage effectively, safeguarding the integrity of your property and the well-being of its occupants.  By taking proactive measures and relying on expert guidance, you can mitigate water damage effectively and ensure a safer environment for you and your family. FAQs How long does it take for water to leak through drywall? The time it takes for water to leak through drywall can vary depending on factors such as the amount of water, the severity of the leak, and the condition of the drywall. In some cases, water may start seeping through relatively quickly, especially if the drywall is already compromised or if there’s a significant amount of water present. However, it may take several hours or even days for noticeable signs of water damage to appear on the surface of the drywall. Does wet drywall always need to be replaced? While wet drywall can often be dried out and salvaged, it ultimately depends on the extent of the water damage. If the drywall is only slightly damp and the damage is caught early, it may be

The-3-Categories-of-Water-Damage (1)
Uncategorized

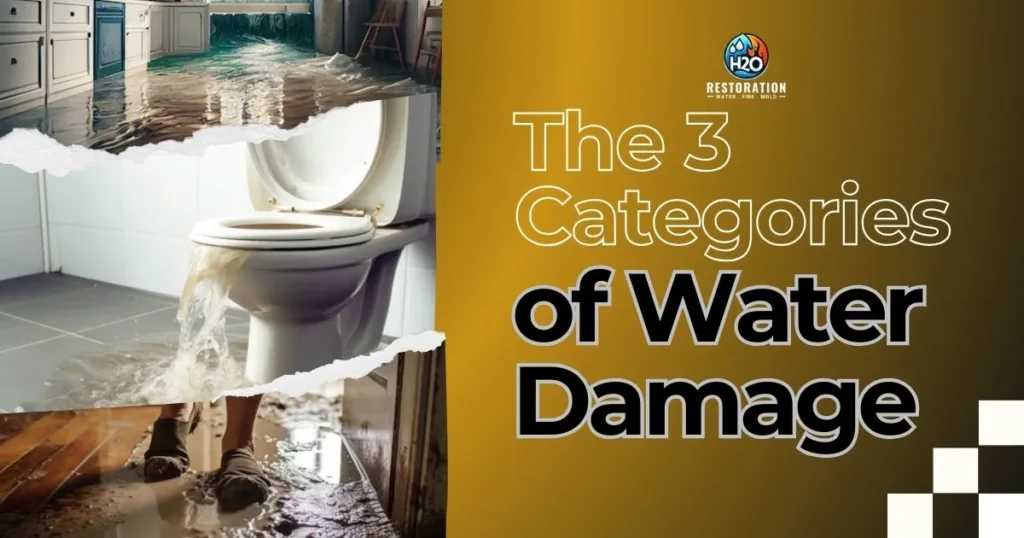
The 3 Categories of Water Damage

Water is a major source of damage in both commercial and residential buildings. The ISO reports that water damage claims rank second in frequency, just after claims for wind and hail damage. When dealing with water damage, it’s crucial to consider various factors, including the category of the damage. The categories of water damage are based on where the water comes from and what it might contain, including any substances it contains. The cleanliness of the water determines the risk it poses to people and the things it contact with. According to the IICRC water classification, these categories reflect the level of contamination in water, taking into account its source and its quality after interacting with materials at the site. While they’re no longer officially recognized, many still use Clean, Grey, and Black Water to describe these categories, which helps in understanding how clean or contaminated each type is. The Different Categories of Water Damage When it comes to water damage, knowing the different categories can help you understand the situation better and what actions to take. The IICRC Standard for Professional Water Damage Restoration (IICRC S500) outlines three categories of water damage: Category 1, Category 2, and Category 3. Category 1 Water Damage – Sanitary (“Clean Water”) Category 1 water damage is described as water that comes from a sanitary source and doesn’t pose a significant risk if touched or ingested. Examples of Category 1 water damage include water from: – Water supply lines – Melting ice or snow – Rainwater – Toilet tanks – Clean toilet bowls Because Category 1 water comes from a clean source and doesn’t pose a substantial risk, it’s often referred to as “clean water.” Restoration contractors can usually salvage and dry materials affected by Category 1 water damage, such as drywall, carpet, and hardwood flooring. Category 2 Water Damage – Significantly Contaminated (“Grey Water”) Category 2 water damage involves water that contains significant contamination and could cause discomfort or illness if touched or consumed by humans. Examples of Category 2 water damage include: – Dishwasher or washing machine discharge – Toilet bowl overflows with urine – Hydrostatic pressure seepage – Broken aquariums or water beds Category 2 water is commonly known as “grey water.” Restoration contractors should remove wet carpet padding and disinfect affected materials like carpeting after Category 2 water damage incidents.  Category 3 Water Damage – Grossly Contaminated (“Black Water”) Category 3 water damage is the most severe type, involving grossly contaminated water that can contain harmful agents. Examples of Category 3 water damage include: – Sewage – Waste line backflows – Seawater – Rising water from rivers or streams – Wind-driven rain from hurricanes or tropical storms Category 3, often called “black water,” requires extensive cleanup. Restoration contractors should remove all affected materials like insulation, hardwood flooring, drywall, carpet, and cushions. Disinfection using antimicrobial spray and HEPA vacuuming is crucial after Category 3 water damage incidents. Understanding the Different Levels of Water Damage If we talk about water damage categories, we’re discussing how harmful the water is and where it’s coming from. On the other hand, the four classes of water damage help assess how much area is affected and the severity of the damage. Class 1 Class 1 water damage is the least severe. It typically affects only a small part of a room or area. Materials in the affected space may have minimal water absorption, and the damage is minor. Class 2 Class 2 water damage is more significant than Class 1. It affects the whole room and materials such as carpet and cushions. Water may have seeped into materials like particleboard, structural wood, and even concrete. Class 3 It often involves water coming from overhead sources like leaks in the ceiling. In Class 3 damage, walls, ceilings, carpets, and insulation can be thoroughly saturated with water affecting the whole area. Class 4 It affects even water-resistant materials like bricks, concrete, and stone. Due to its severity, class 4 damage usually requires specialized treatment methods and longer drying times. Understanding the different classes of water damage helps homeowners and restoration professionals assess the extent of the damage and determine the appropriate steps for restoration and repair. Immediate Steps for Water Damage Repair 1. Get Professional Help: It’s important to contact certified water damage restoration experts right away. 2. Stay Safe: If the water is Category 2 or 3, disconnect electrical devices and leave the area for safety. 3. Document the Damage: Take pictures and notes of how extensive the damage is. This helps with insurance claims later. 4. Remove Water: Use pumps and vacuums to get rid of the water, depending on how bad it is. 5. Dry Everything: Use strong dehumidifiers and fans to dry out the area quickly. 6. Clean and Disinfect: Treat the area with special products to stop mold from growing, especially if it’s Category 2 or 3 water. 7. Restore: Finally, replace anything that’s too damaged and bring the property back to how it was before the water damage. Empowering Response with the Right Understanding  Even if you have a maintenance team available to handle water damage, seeking professional assistance is integral to avoid worsening the situation. Trying to address water damage on your own could result in further structural issues, prolonged business interruption, and potentially serious health risks. The H2O Restoration is well-equipped with knowledge and relevant tools to handle any type of water damage professionally.  However, knowing the classes and categories of water damage can empower you to respond appropriately to each situation, even before seeking professional assistance. Being able to recognize the different types of water damage enables better communication with contractors, insurance agents, repair teams, tenants, and others involved in the process. Final Thoughts  Understanding water the 3 water damage categories and classes is key to addressing water damage effectively. Whether it’s clean water from a burst pipe or contaminated water from a sewage backup, knowing the severity of the damage helps in planning the right restoration steps.

Mold and Bleach_ A Closer Look at the Facts Behind the Myth
Uncategorized

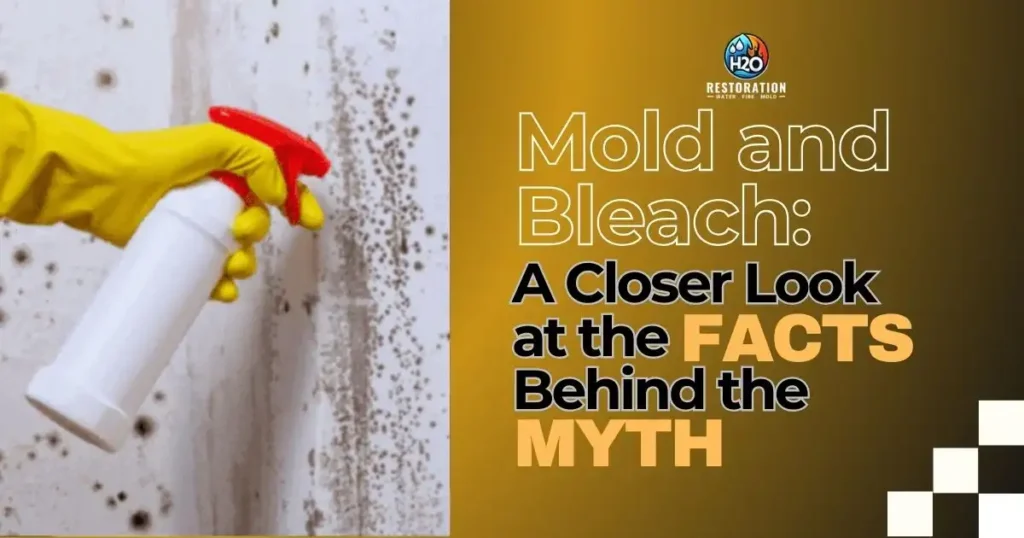
Mold and Bleach: A Closer Look at the Facts Behind the Myth

Upon discovering mold, many homeowners resort to using bleach due to its ability to effectively remove dark stains and seemingly eradicate the mold. However, it’s essential to note that bleach lacks EPA approval as a biocide and is not recommended for mold removal or odor elimination. Merely pouring a bleach solution is insufficient, even if it successfully eliminates the surface layer of mold. Whether the mold is alive or dead is inconsequential; the presence of mold remains a health concern. Even deceased mold retains allergenic and potentially toxic properties. To fully address the issue, not only must the mold be killed, but any contaminated materials must also be thoroughly cleaned and removed. Let us discover the facts and myths behind using bleach in eradicating mold, to examine if it’s effective and to what extent it could help us in mold remediation. What are Molds?  Molds are microorganisms that naturally exist in the environment and thrive in areas abundant with moisture and oxygen. Belonging to the fungal kingdom, they typically inhabit damp environments like soil, plants, and decomposing organic matter.  Outdoor molds serve a vital role in nature by decomposing dead organic material such as leaves, trees, and debris. However, indoor mold growth should be prevented and mitigated. Identifying Mold Infestations Mold is often visible in common areas like bathrooms or kitchens, but it can also develop in concealed spaces such as behind wallpaper or in basements. Among the numerous fungi responsible for mold growth, the prevalent indoor molds include Alternaria, Penicillium, Aspergillus, and Cladosporium. A musty odor often indicates hidden mold, necessitating a thorough inspection of potential breeding grounds. Mold growth can occur on: The Truth About Bleach and Mold The Use of Bleach on Non-Porous vs. Porous Surfaces The efficacy of bleach in combating mold remains a topic of debate and uncertainty. On non-porous surfaces such as tiles, glass, and countertops, bleach effectively eliminates surface mold, making it a feasible choice for cleaning these materials.  However, mold’s mycelium, or root system, can deeply infiltrate porous materials like wood, drywall, and grout. In such instances, bleach’s surface-level impact proves insufficient to reach and eliminate the mold’s underlying structure, potentially leading to regrowth and further complications. Truth vs. Lie Regarding Bleach for Mold Remediation Lie: Bleach is universally effective for removing mold from any surface. Truth: While bleach can effectively clean mold on non-porous surfaces, it lacks efficacy against mold on porous materials. Lie: Bleach permanently eradicates mold. Truth: Bleach may eliminate visible mold, but without addressing the underlying moisture issue, mold regrowth is likely. Lie: Bleach is safe for all mold remediation tasks. Truth: Using bleach for mold cleanup carries health risks, particularly in poorly ventilated areas, and should be approached cautiously. Combining bleach with other household chemicals can result in the production of explosive gases. Additionally, if bleach comes into contact with paint, fabrics, or wood, it can cause discoloration. Health Risks Associated with Using Bleach Utilizing bleach, despite its potent disinfecting properties, entails notable health hazards, particularly in confined areas lacking adequate ventilation. Inhalation of bleach vapors can lead to irritation of the respiratory tract, eyes, and skin, thereby endangering individuals, particularly those with respiratory ailments like asthma.  Moreover, when bleach interacts with ammonia or other common household cleaners, it can generate toxic gases such as chloramine and chlorine gas, further compromising health and safety. Factors Contributing to Mold Growth in Home Mold, a common nuisance in many households, thrives in environments with moisture and oxygen. While it plays a natural role outdoors in decomposing organic matter, indoor mold growth poses health risks and structural concerns.  Understanding the causes of mold growth and implementing preventive measures is important for maintaining a healthy living environment. Here are some common causes of mold growth in your home and tips on how to prevent them: 1. Persistent Humidity Areas with consistently high humidity levels, such as bathrooms, kitchens, and closets, are susceptible to mold growth. Ventilating your home well, especially during warmer months, helps reduce moisture buildup in the air and discourages mold growth. 2. Leaking Pipes Leaking pipes behind walls or under sinks provide ample moisture for mold growth. Regularly inspecting and repairing plumbing leaks can prevent mold from proliferating in hidden areas of your home. 3. A Leaking Roof A damaged roof can lead to moisture accumulation in ceilings and attics, promoting mold growth on walls and ceiling boards. Regular roof inspections and repairs are essential for preventing mold issues. 4. Build-Up of Condensation Fluctuations in temperature during winter can cause condensation to accumulate on cold surfaces like metal pipes, concrete, and brick walls. Properly ventilating each room helps remove excess condensation and discourages mold growth. 5. Poor Ventilation Inadequate airflow in your home creates stagnant air, providing an ideal environment for mold growth. Ensuring proper ventilation throughout your home helps remove moisture and reduces the likelihood of mold formation. 6. Wet and Damp Clothing Damp clothing left sitting for extended periods can contribute to mold growth, especially during warmer months. Promptly hanging up wet laundry helps prevent mold from thriving on damp surfaces. 7. Home Flooding After experiencing flooding, your home may remain damp for days or weeks, creating favorable conditions for mold growth. Seeking professional mold cleaning and inspection services post-flooding is integral for preventing mold-related health issues. 8. Damp Basement Basements, being below ground level, are prone to higher levels of moisture and humidity. Proper maintenance and ventilation of basements help mitigate moisture buildup and prevent mold growth. 9. Foundation Dampness Improper yard slope or landscaping can cause water to pool around the foundation of your home, leading to mold growth on walls. Ensuring proper drainage away from the foundation helps prevent moisture accumulation and subsequent mold issues. 10. Leaking Air-Conditioning System Leaking air conditioning systems or condensation build-up can foster mold growth, particularly in humid climates. Regular inspection and maintenance of air conditioning units, including checking for leaks and cleaning filters, help prevent mold growth. Proactive measures such as controlling humidity levels, enhancing ventilation,

Exploring Sustainable Materials for Home Restoration
Uncategorized

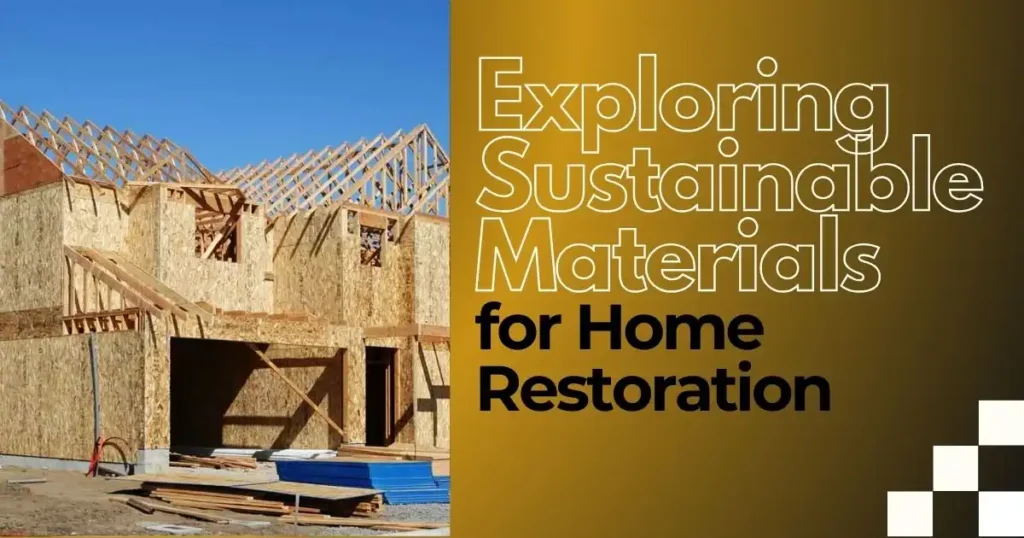
Exploring Sustainable Materials for Home Restoration

In recent years, the emphasis on sustainability has become increasingly prominent in various industries, including home restoration and renovation.  As homeowners strive to reduce their environmental footprint and create healthier living spaces, the demand for sustainable building materials has surged. The global green building materials market reached US$ 346.4 billion in 2023, reflecting the growing interest and investment in eco-friendly construction solutions. Using eco-friendly materials in home restoration projects brings many benefits. This includes highlighting key sustainable materials that help in home restoration and offering useful insights and examples to assist homeowners in making informed decisions. What is Sustainable Materials Sustainable materials are resources and products that are harvested, manufactured, or utilized to minimize environmental impact and promote long-term ecological balance. Further, these materials are sourced from renewable or recycled sources and are produced using environmentally friendly processes that conserve resources and reduce emissions. Sustainable materials prioritize efficiency, durability, and recyclability, ensuring that they contribute to the creation of healthier, more resilient built environments while mitigating harm to the planet. By embracing sustainable materials, individuals and industries can play an important role in fostering sustainability and combating climate change. Here is the list of Sustainable Materials: 1. Reclaimed Wood Reclaimed wood refers to lumber salvaged from old buildings, barns, or other structures and repurposed for use in new construction or renovation projects. This sustainable material offers several benefits, including: – Environmental preservation: Repurposing existing wood rather than harvesting new trees, reclaimed wood helps conserve natural resources and reduces deforestation. – Unique aesthetic appeal: Each piece of reclaimed wood carries its history and character, adding warmth and authenticity to interior and exterior spaces. – Durability and longevity: Despite its age, properly treated reclaimed wood can be as durable as or even more resilient than newly harvested lumber. One notable example of a famous building that utilizes reclaimed wood is the Seattle Convention Center Summit building. This iconic structure, located in downtown Seattle, Washington, incorporates reclaimed wood sourced from salvaged materials, such as old-growth timber and industrial beams. The Summit building’s design seamlessly integrates these reclaimed wood elements into its architecture, showcasing the beauty and character of recycled materials while reducing the environmental impact of construction.  2. Recycled Glass Countertops Recycled glass countertops are made from crushed glass shards embedded in a resin or cement binder, offering a visually striking and eco-friendly alternative to traditional countertop materials. The benefits of recycled glass countertops include: – Waste reduction: Utilizing recycled glass diverts waste from landfills and reduces the demand for new raw materials. – Versatility in design: Recycled glass countertops come in a variety of colors and patterns, allowing homeowners to customize their kitchen or bathroom surfaces. – Durability and low maintenance: These countertops resist scratches, stains, and heat, making them suitable for high-traffic areas. The trend of recycled glass countertops is increasingly popular in upscale kitchen design, offering homeowners an eco-friendly option. Made from recycled glass shards in a resin or cement binder, they provide a sustainable alternative to traditional materials. With various colors and patterns, they offer creative customization, adding elegance to modern kitchens. Plus, they’re durable, scratch-resistant, stain-resistant, and heat-resistant, making them ideal for busy households. 3. Bamboo Flooring Bamboo flooring is a renewable and eco-friendly alternative to traditional hardwood flooring, as bamboo plants reach maturity much faster than trees. Key benefits of bamboo flooring include: – Rapid regrowth: Bamboo plants can be harvested for flooring every 5-7 years, making them a highly sustainable resource. – Strength and durability: Bamboo flooring is known for its strength and resilience, offering comparable durability to hardwood options. – Indoor air quality: Bamboo flooring is naturally resistant to pests and mold, contributing to healthier indoor air quality. Bangkok Tree House in Bangkok, Thailand, which serves as an excellent example of bamboo flooring. Situated on the lush Phra Pradaeng Peninsula, this unique establishment stands out for its sustainability and eco-conscious design.  Bamboo is prominently featured throughout the hotel, from siding to ceilings and floors, highlighting its abundance and durability as a building material.  This innovative use of bamboo enhances the hotel’s aesthetic appeal and underscores its dedication to eco-friendly practices, making it a notable model of sustainable architecture in bustling Bangkok. 4. Energy-Efficient Windows Energy-efficient windows are a key component of sustainable home design, engineered to optimize thermal performance and minimize energy loss. In addition, one crucial aspect contributing to their efficiency is the choice of frame material. The frame material of a window significantly impacts its energy efficiency. For instance, vinyl frames are highlighted for their superior insulation properties, effectively reducing heat transfer and minimizing air leakage. Additionally, vinyl frames require less maintenance compared to traditional materials like wood, making them a practical and cost-effective choice for homeowners seeking energy-efficient solutions. Furthermore, the incorporation of multiple panes of glass, often featuring low-emissivity coatings and insulating gas fills, further enhances the energy efficiency of these windows. These advanced technologies work in tandem to create a thermal barrier, preventing heat from escaping during the winter and minimizing heat gain in the summer. As a result, energy-efficient windows not only reduce heating and cooling costs but also enhance overall comfort within the home, making them a valuable investment for environmentally conscious homeowners. Key benefits of energy-efficient windows include: Improved thermal performance: Low-emissivity (Low-E) coatings and insulated glazing units help regulate indoor temperatures, reducing the need for heating and cooling. Energy savings: Energy-efficient windows can lower utility bills and decrease carbon emissions by preventing heat loss in winter and heat gain in summer. Enhanced comfort and noise reduction: Energy-efficient windows provide better insulation against outdoor noise and temperature fluctuations, creating a more comfortable living environment. One prominent example of a building that has embraced energy-efficient windows is the iconic Empire State Building in New York City, USA. Despite its historic stature, the Empire State Building underwent a significant transformation in 2011, earning a gold certification from LEED (Leadership in Energy and Environmental Design). This extensive renovation included replacing all 6,514 glass windows with much more energy-efficient alternatives.

Why Quick Response is Important in Disaster Restoration
Uncategorized

Why Quick Response is Important in Disaster Restoration

Imagine your business gets hit by a storm. You want to get it up and running again as early as possible, right?  In the unfortunate event of a disaster affecting your home or business, time is of the essence. Whether it’s a storm, fire, flood, or any other natural calamity, the promptness of response can make a significant difference. That’s where emergency property restoration services come in. They swoop in to minimize the damage and get things back on track. Further, a timely disaster response can prevent or lessen the severity of the adverse effects, ultimately safeguarding communities and infrastructure and reducing the cost of the restoration process. Understanding the Phases of Disaster Relief Emergency response agencies follow a systematic process in responding to emergencies. The process highlights the importance of the ‘response’ phase as it is the initial step that must be taken before proceeding to the other phases. Response When disaster strikes, the initial response involves search and rescue operations and providing immediate relief like medical care, food, water, and temporary shelter. Depending on the type and location of the disaster, assistance may come from both global and local organizations. While international groups bring resources and expertise from around the world, local agencies offer community knowledge and networks, often earning greater trust from those affected. Recovery The recovery process begins once immediate needs are met and the situation stabilizes. This involves rebuilding physical infrastructure like roads, schools, hospitals, and non-physical structures such as government institutions and business sectors. Recovery presents an opportunity to create stronger communities. Risk Mitigation Building resilience is key to mitigating future risks. Measures like constructing earthquake-resistant buildings and investing in peacebuilding initiatives can reduce the impact of natural and man-made crises. Studies show that every dollar spent on natural disaster mitigation saves society eleven dollars on average. Preparedness While communities can’t eliminate all disaster risks, they can prepare to minimize damage. This includes stockpiling supplies, developing response protocols, conducting drills, and implementing insurance pooling mechanisms. These activities enhance preparedness and reduce the human and economic toll of disasters. Quick Property Restoration Services Matter Improves Cleaning Efficiency, Reduces Costs Disasters like hurricanes, floods, or tornadoes can cause significant and widespread damage to your property. A rapid response from an emergency property restoration service can assist in swiftly repairing and reconstructing your home or business. The sooner the restoration team arrives, the more effectively they can prevent additional damage. Quick response times also enable restoration companies to start work promptly, reducing the overall expense of the restoration project. Quickly Restores Quality of Life When emergencies strike, they often result in significant losses of resources, infrastructure, and even lives. While it’s challenging to reverse infrastructure damage, a prompt response can help mitigate further loss of life.  Moreover, it accelerates the restoration process, alleviating physical, mental, and psychological distress caused by the disaster. Additionally, a swift response can substantially reduce the impact of the disaster, saving costs and restoring normalcy sooner than anticipated.  Damage Mitigation The faster the disaster restoration company arrives at your property, the less harm will occur. This is because when water or other disaster elements linger, they have more time to cause problems. A prompt response diminishes the likelihood of developing mold, mildew, and other secondary issues. Mold, for instance, needs time to grow, and addressing the problem swiftly leaves it no opportunity to take hold. Furthermore, collaborating with an emergency property restoration service that responds quickly can provide reassurance and peace of mind. Knowing that help is on the way instills confidence that the challenging situation will be addressed promptly and effectively. Business Continuity Expert restoration companies such as H20 Restoration prioritize quickly getting your business back to normal. A fast response is important for all types of businesses because it helps to keep downtime and lost hours to a minimum.  Studies show that nearly 83% of organizations can only handle up to 12 hours of downtime before they start to suffer negative consequences. However, only 52% can restore their critical systems within that time frame after a severe data loss event, and 29% need a day or more to recover. Business owners would greatly benefit from resuming operations as soon as feasible. Hence, services provided by restoration companies assist businesses in getting back to normal quickly after a disaster, which helps to keep things running smoothly and consistently. Simplified Insurance Claims Processing Efficient documentation and reporting are essential for filing insurance claims following a disaster. Promptly recording property damage streamlines the claims process. Experienced restoration services are skilled in gathering the necessary documentation, improving the likelihood of sufficient coverage.  Insurance companies frequently require proof of quick response for coverage eligibility. These restoration services compile essential documentation, including: Key Considerations for Disaster Restoration Health and Safety Addressing both visible and hidden threats is essential to ensure the complete safety of individuals affected by disasters. Restoration services help identify and mitigate potential hazards that may not be immediately apparent.  By leveraging their expertise, restoration professionals can thoroughly assess the damage and implement measures to safeguard the well-being of both occupants and restoration workers. Financial Considerations Restoration services provide invaluable assistance in navigating the complex insurance process, helping clients minimize the financial burden associated with disaster recovery. By guiding clients through insurance claims and advocating on their behalf, restoration companies ensure that clients receive maximum coverage for their losses.  Additionally, quick response in disaster restoration aimed at minimizing out-of-pocket expenses further alleviates the financial strain on affected individuals and businesses. Expertise The specialized skills and experience of restoration professionals are indispensable in effectively addressing the challenges of disaster cleanup. From identifying hidden damage to executing complex restoration tasks, restoration companies possess the expertise necessary to ensure thorough and efficient restoration efforts.  By entrusting the restoration process to qualified professionals, individuals, and businesses like H2O Restoration can have confidence in achieving optimal outcomes and restoring their properties to pre-disaster conditions. Final Thoughts  Quick response in disaster restoration is essential. It’s like putting out a fire

Scroll to Top